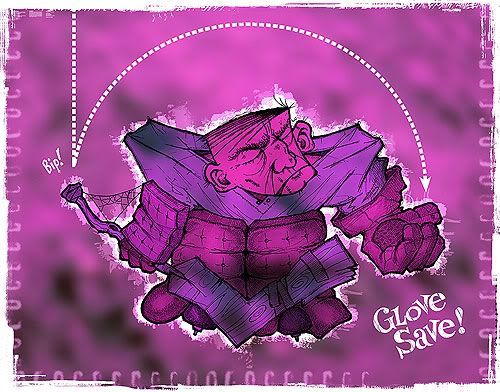
I was asked recently to divulge how I go about making my illustrations, namely some that seem to be sharing a similar process and style of late. So here I'll describe how I went about creating the goalie I drew for Illustration Friday's recent glamour theme from a few weeks ago.
1) The Meeting Doodle – meetings can last an eternity. During one in January, for some reason I was picturing a hockey goalie so fat and immobile that he fills every inch of the net he's guarding – to the point that his dimensions are identical to the net, which is basically a square. I doodled a rough first attempt, but quit – since I think I was being watched.
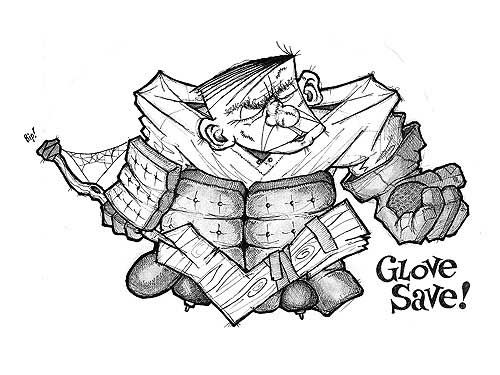
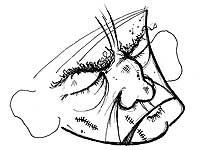
2) The Sketch – later on, I put the idea to paper straight out of my head (above). There's not much I can draw this way – subject matter without reference material of some sort – but hockey players are one of them. I drew him in the style of "yesterday's player" than a modern-day goalie to enhance the fact he benefits more from girth (re: luck) than skill. This meant bulky pads, a few scars, a stick seemingly carved straight from the tree and no helmet. His rough shape and features were done first in pencil, then drawn over and detailed in pen and scanned into the computer.
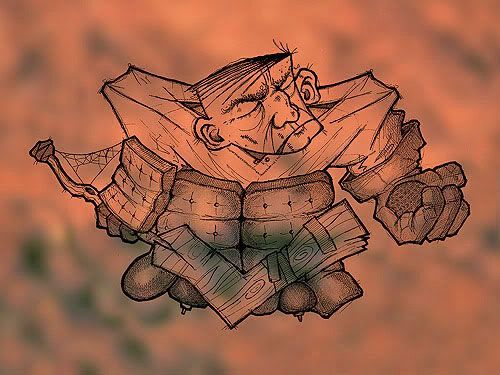
3) Amendments – his face didn't work out the way I had imagined, but it's sealed in pen now and what can I do? That's my bad for not doing more in pencil right off the hop. I pulled out a few sheets of thinner paper, traced some outlines of his head and filled them in with a few stand-alone faces. The best one (right) was superimposed overtop of the image and merged in Photoshop by erasing away the bum parts of the original head. His shoulder-pads were also fixed to appear more symmetrical; the left shoulder was copied, flipped, pasted over the shorter right shoulder-pad (which was then erased) and merged with the rest of the figure. He was then pretty much ready to go (below).

4) Background – I knew the feel I wanted for this illustration from the get-go, in terms of colour and an overall look. In Photoshop, a texture backdrop was added first, made by blurring a photo I took of some rusted metal a few years ago (below). Any colours I used would then be subtle offshoots of this reddish-brown theme.
5) Colour – different parts of the goalie were 'painted over' with flat colours ranging from red to blue – to help differentiate the parts of his uniform – and saved as separate layers in overlay mode to blend with the background overtop of the base sketch layer (below).
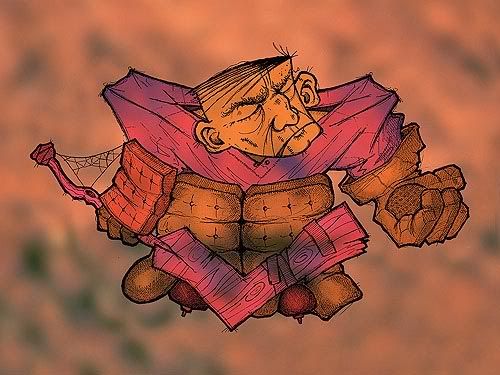
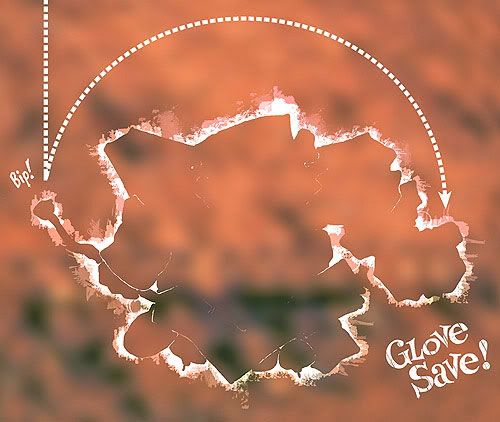
6) Details – The illustration's words, arrow and other effects were added last. The words, even though part of the initial sketch, were cut early on, inverted to white and pasted in a separate layer for tweaking at the end. The arrow was built in Illustrator and added as its own layer. The white glow around the goalie was added late when I found the image as a whole was skewing too dark and muddy (below).
Once the image was finished, I added the scratchy frame effect – then changed my mind about the colour scheme and skewed the entire thing from rusty red to purple using hue shifts in Photoshop (below).
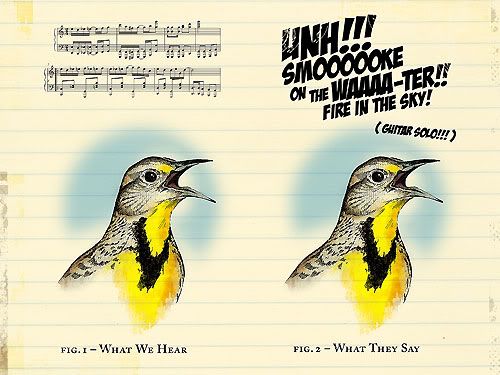
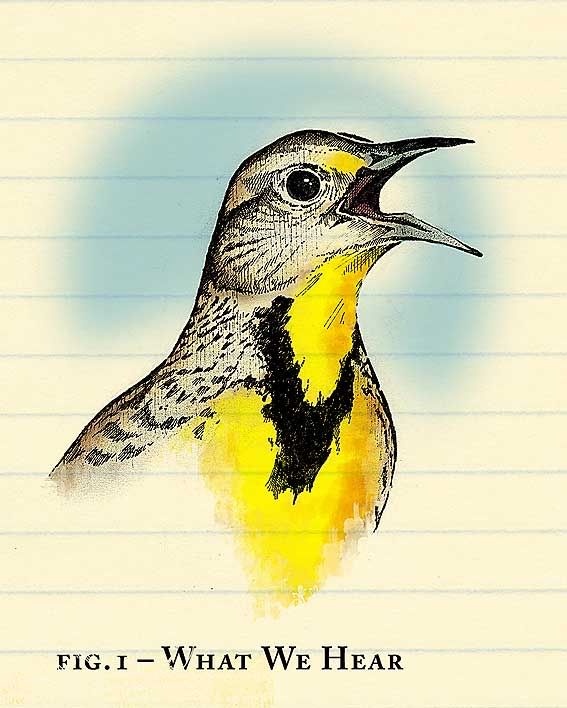
I always wonder what birds sing. They seem to do it all the time. But until we invent some form of universal translator device, we will never know. Using this logic, I suppose there's equal chances that a bird is trilling a melodious ode to its mate – or belting out Deep Purple. We just don't know. Using my old Encyclopedia Of North American Birds for source material, I sketched this western meadowlark portrait with pencils and pen over about two hours on Sunday afternoon. The colour and extras were added in Photoshop layers (a scan of a yellowed newsprint notebook and a JPEG of free sheet music from a Google image search). You can click here for a closer look at the meadowlark detail.
Oh yeah, this week's Illustration Friday theme was song.

This past weekend I had the honour – and surprise – of being Sunday's feature site on Catherine Morley's Designers Who Blog, a giant online storehouse of, well, exactly that: blogs, be them personal or business-related, maintained by graphic designers (and other like-minded folk, such as Tuesday's bearded star and creative everything Ward Jenkins). Honour and surprise are two words to describe it best. This humble site was created late-late in 2004, solely as a means to beat a terrible creative funk I was enduring. The larger community that it helped introduce me to – that would be you guys – has been a continual and vital inspiration ever since. Otherwise this joint may have well been one of those things that peters out after awhile with indifference and the ever-present urge to just sit, blah and let the brain fester back to the state it was in when I started out. Now what's on TV tonight?

Illustration Friday offered a theme of simple this week, and busy as I am – at work and in the evenings lately – I was ready to let this theme slip by, only drawing a half-completed doodle on the weekend. I obviously didn't listen to the famous and sage advice of the KISS principle: Keep It Simple, Stupid. But Kerry came to my rescue with a brilliant idea on Sunday night; that she ghost-draw, in my place, something for the theme. I agreed, because of all the people submitting to Illustration Friday this week, nobody's work would be more simple than mine. Because in the end, is there really anything more simple than delegation?
So in the spirit of those Family Circus* cartoons drawn by Billy, this week's Jeopopolis submission was made by Kerry. The first (left) is a simple female figure drawing (very cool; I'm often unable to make stuff like this, boiled down to its purest form). And second (right, tipped on end) is a sketch of one of her über-comfortable Simple shoes.
Everybody say "thanks, Kerry"! I sure am. And as always, let us know what you think.
* This is the first, last and only time I will ever mention The Family Circus here.

This week's Illustration Friday submission started as an exercise in futility. Take the saying one's eyes are bigger than one's stomach and twist it in an artistic sense and you get a situation I often fall into. In my case, my concept is occasionally bigger than my execution. Because Kerry and I spent the majority of our weekend painting the kitchen ceiling and hiding (hopefully once and for all) the Great Pipe Leak of '06, I wasn't planning on entering a piece for the current I-F theme (chair). But I had an idea that would take the theme and tie it to the upcoming Winter Olympics, an event I always watch and love. I started doodling my idea of a couch potato in an armchair careening down a slalom course, in a tribute to the many others out there like me who tune in every four years. Attempts on Sunday and Monday to put it to paper though, didn't work out, and I decided to drop it. But today I came up with this compromise, a fast spoof on the universal and basic forms of Olympic design. The colour scheme is taken directly from the logo for the next Winter Games in Vancouver, which I'm determined to attend.

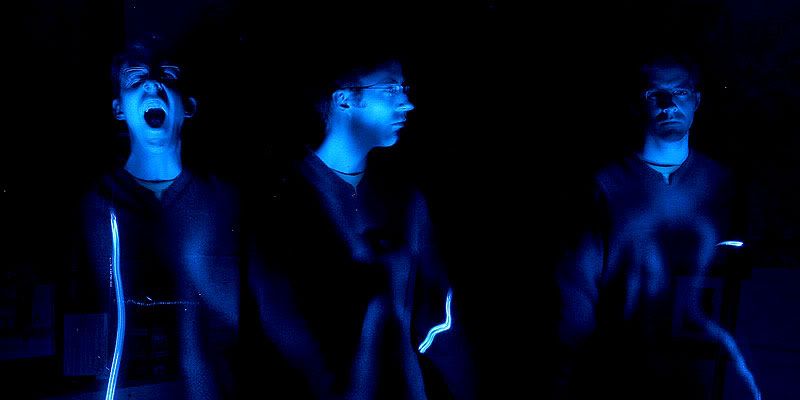
The current theme over at PhotoFortnight (night) offered a chance to take my camera and a tripod into the basement and take this series of pictures, which came out much creepier than I ever could have imagined. While I quickly scanned through to pick one for a submission, I kept the moodier ones away from Kerry because it was bedtime – and these shouldn't be the last thing anyone sees in a day. But they did come out really, really cool.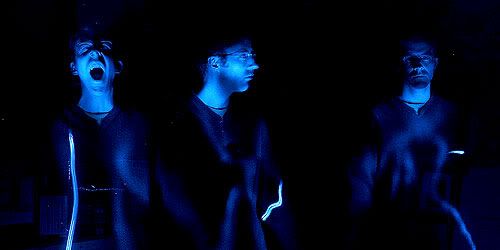 I tried my hand at spelling with the blue flashlight we got for Christmas (top, reversed to correct direction), and then did this one (above) where I stood in each position – about eight seconds each – and illuminated myself with the light. You can click here for a closer look.
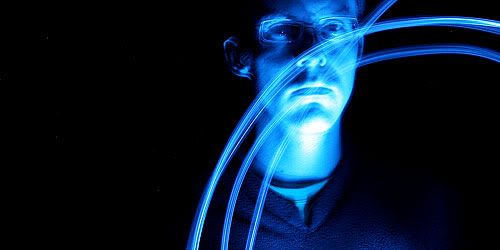
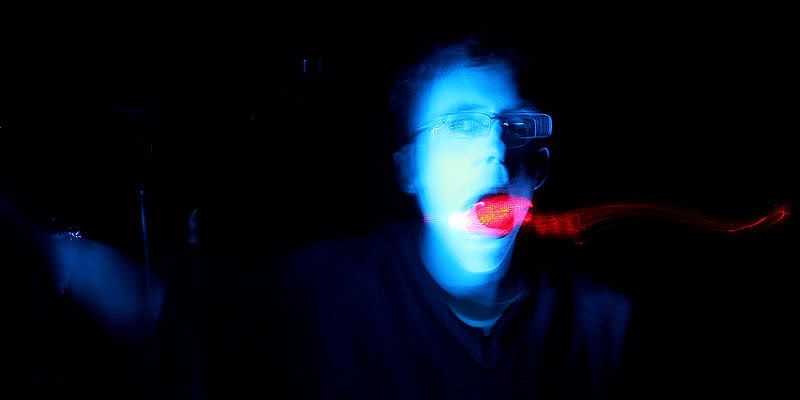
Here I'm just leaning against a support column and spinning the flashlight around. And trying to keep perfectly still.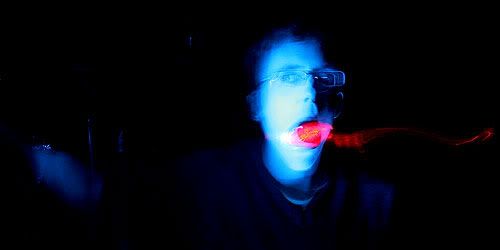 This is the one I chose for PhotoFortnight. I'm leaning low against the same column and holding my flashing bicycle nightlight with my teeth. Click here for a closer look.
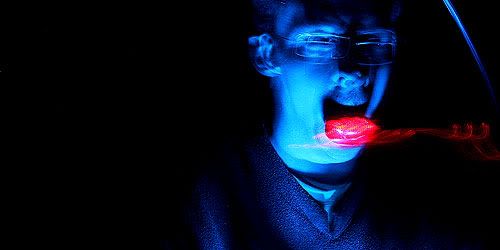 This one's pretty similar except I wasn't able to stand still, hence the double-vision effect (click here for a closer look). Like I said, creepy. But I'm really a nice guy ... just playing around in a dark, unfinished basement for a photo contest.
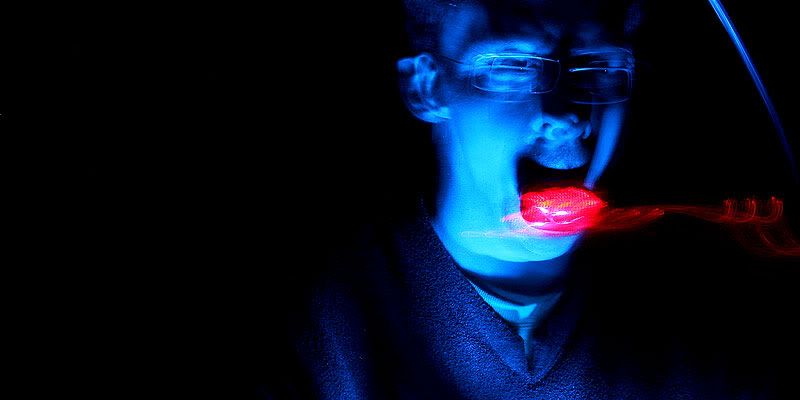
  That's me in the corner; that's me in the spotlight. To the right is the furnace and to the left is my bicycle, which I miss using badly. Mebbe someday Kerry and I will have enough junk that we might start filling up the basement, but for now it's pretty much empty. Click here for a closer look.
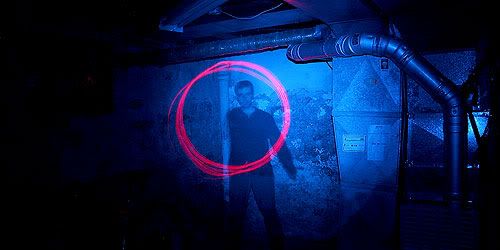 Here the flashlight's balancing on top of the camera and I'm spinning the red nightlight around in circles – kind of neat. It was around this time that the camera battery ran out. All in all I took about 30 pictures, mostly slight offshoots of the ones shown here – taking just over an hour. These are all 30-second exposures taken using the Canon Rebel's time-value mode, and only cropping and sharpening was needed afterwards.
